It's now the middle of November and I've been making beads for just over a week. Last month I bought the book 'Making Glass Beads' by Cindy Jenkins and that inspired me even more. Finally at the beginning of the month I ordered a kit to get started.
I've also been in touch with a couple of other new lampworkers in the area - hi Evelyn and Valentina! :o) I have to say thank you to everyone who is helping me to feel like this is something I CAN do!
I set up my kit in one of the bedrooms, make-shift for now, but I have at least got decent ventilation in there which I know is important. I took a chair in to sit at while I made the beads but forgot to use it! Somehow standing at the torch just seemed natural. The day I set everything up I was completely nervous, I puttered around all morning trying to delay the lighting of the torch, and wondering what I was getting myself into and thinking I should just return everything because the whole idea was crazy!
Finally I plucked up courage and struck a match. I have to say that it wasn't as frightening as I thought it was going to be, the torch did what it was supposed to and I had a nice flame.
I bought two cannisters of gas, one of brazing fuel from Canadian Tire (black can), and one of their propane (blue can). I used the brazing fuel first since this seems to be the fuel of choice over propane. I checked the torch and cannister for leaks with soapy water before I struck any matches!!
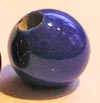
I took a deep breath and with my mandrels coated with bead release I started to warm some glass up. I was so nervous that the rod was going to shatter and glass bits would go flying everywhere that it took me a long time to have the confidence to actually hold the glass in the flame for more than a second at a time. It didn't shatter and my first little blue bead was born.

As soon as I had plunged it between the layers of the fibre blanket I turned the torch off, took a deep breath and ran from the room! I was feeling a mixture of excitement and intense relief that the operation was over.
Then I started to pace up and down and realised I had to go back and try another, so I did -

My little blue bead had a friend and I had been bitten by the bead bug.
SECOND SESSION

Since the first day I have tried to spend some time at the torch each day. My first beads started out a bit wonky, and I hardly ever get the end result I was looking for, but I'm having a lot of fun.
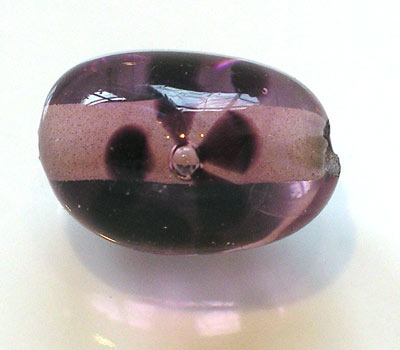
My second session went fairly well and here are the beads I made. I tried a few different things here, I tried to make a little blue rat - least said about that the better! I used the rake on one bead, tried to get a cylinder shape which failed, but ended up with a couple of interesting looking beads. I also tried to melt some blue glass from a Bristol Cream sherry bottle - that glass must be harder because it took forever to start to melt and it was so thick I could barely get it on the mandrel - guess I need a bigger torch!!
I tried to do some kind of flower as well, that's the weird looking yellow and blue one, it's funny, it's so strange I like it!
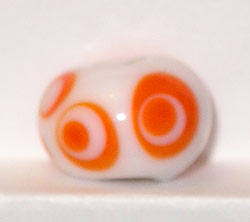
At the end of the day I went online to watch a couple of beadmaking videos - thank you Ross from Wet Canvas! I had watched them before I got the kit, but seeing them after trying to make some beads was a huge help. I fired up the torch and made my very first 'stacked dot bead' I was very happy with this one!! -

WORK AREA
Before I go any further I'll show my make-shift beading area.

I had to use Rebeka's bedroom, it was the only option as the sunporch is going to be VERY chilly before long. How lovely it must be to have a room set up just for lampworking, and I'm realising how long those little gas cannisters don't last for! One day perhaps I'll be able to have something a bit more permanent.
Here is my dwindling supply of glass rods

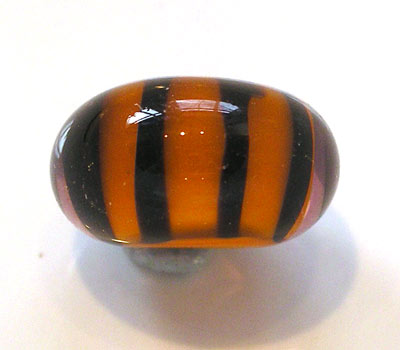
And here is my very first twistie that I made today!
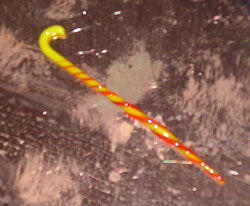
Looks like a candy cane doesn't it! For those who haven't got a clue what I'm talking about, a twistie is one way to decorate a bead. There are stringers and twisties, a stringer is a length of glass heated and pulled thin, a twistie is the same thing except you can have two or more colours and as you pull the glass you twist, so that you (hopefully) end up with a nice spiralling design. It's going to take a lot of practice to get good at those, I'm only just beginning to get a feel for pulling the stringers, it's a fine line between hair thin strands and lumpy messes!
PROGRESSING
Since my first two attempts at the torch I learned something very interesting. The bead wants to be a bead! I read this on one of the glass forums and how true it is! What it meant to me was that I needed to slow down and let the glass do its thing, instead of trying to control what was going on so much. As the glass melts on the mandrel because of surface tension and gravity it tries to pull itself into a nice round blob. By turning the mandrel s-l-o-w-l-y I am getting much nicer shaped beads with real dimples in the ends of them! It's very exciting!


I've also been playing around with dots, melting them in and seeing what happens.
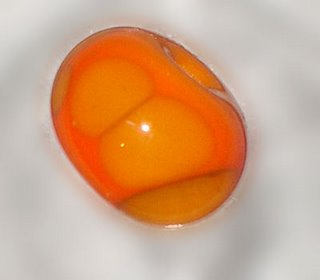
I desperately want to do some beads with nice size bubbles in them too, easier said than done! I've tried a few and find the bubbles either disappear altogether or are only visible under a magnifying glass!! Maybe my base bead is too hot w
hen I put the clear glass over the dimple I've made in it.

See this teeny tiny bubble? This is also another attempt at a cylinder bead. Not doing too well with them, I'm practicing rolling the hot beads on the marver but haven't quite got the hang of it yet. My cylinder beads end up just being a strange shape. This one is a slight improvement because I have got almost dimples in the ends, the last two I tried had nasty pointed rough ends, I don't have a picture of them (I think one of them has gone down the drain in the kitchen to be honest! - but we won't say anything about that!).
This next cylinder Is getting better, it's smoother at least. I started with green on either end of the bead, filled it with ivory and then ran a thin line of black around the middle. Once it was melted I raked it. I can't say I care for the colour combination, but you gotta work with what you have - right!

By this time I have switched from the brazing fuel to propane. I haven't noticed too much difference, the colours in the beads seem ok, not grey. I've had a couple where the clear glass looks a bit murky and that must be where I have got over excited and rolled it too far into the flame. Propane is about half the price of the brazing fuel so I'll be sticking with it for now.
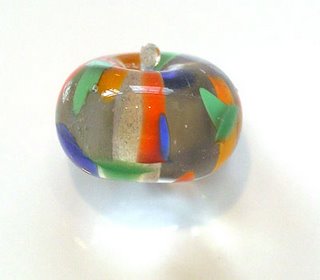
STIPES AND CYLINDERS
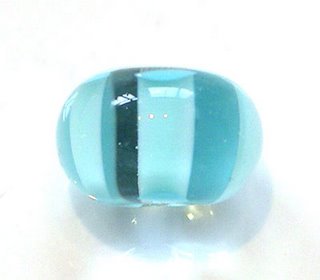
I've also been trying to get some striped beads, to do this you place dots around the centre of a base bead, layer clear glass on top and then melt everything down to a nice shaped bead. I'm getting the shapes, but my stripes don't go all the way to the mandrel and they are pretty ugly where they stop.

Also included in this batch is one with different colour dots melted in - see I got a jaggy at the edge of the hole.
Still having fun with dots too, I like how they transform when they are layered one on top of another.

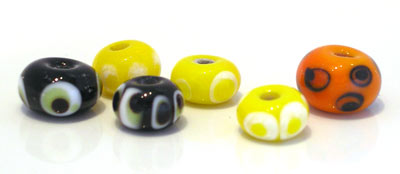
In between having fun messing around I have been trying to make enough similar beads to make into a necklace or bracelet - here they are -
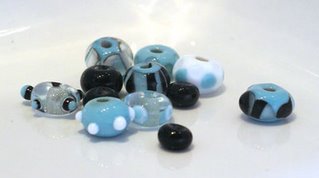
It's hard to get two the same size, one more thing that comes with time and practice.

Today I have started to make some progress with those darn cylinders! I made three and the shapes are slowly getting better, here are todays, the blue one is using the red and yellow twistie I made -

and a picture showing how they are slowly improving. I spend a lot of time on the glass forums looking at everyone's beads and tutorials and I keep telling myself - they were beginners once!